SOUTH KAZAKHSTAN STATE PEDAGOGICAL INSTITUTE
NATURAL SCIENCES FACULTY

Department of Computer Science
Course works
Theme: The creation of automated systems of shop "auto Parts"
Prepeared by: Tukhtamuratov S
Group: Computer science 111-14 «а»
Checked by: Lesbaev A.U
Shymkent - 2017
CONTENT
I. INTRODUCTION..............................................,,,,................................................
II. pts of a database, information about delphi…………………………………...
2.0 Database architecture in Delphi…………………………………………….
2.1 Form and itsproperties, Searching for data, Data filtering…………………
III. The creation of automated systems of shop "Auto Parts"…………………
3.0 Form.............................................................................................................
3.1. Searching......................................................................................................
3.2. Filtering…....................................................................................................
IV. CONCLUSION...................................................................................................
V. RECOMMENDED BIBLIOGRAPHY…………...............................................
I. INTRODUCTION
Modern management can not imagine. The main category for any efficiency of an enterprise is often related information processing systems. By results of such system:
- To provide the general report or detaldanğan;
- identify trends in the main indicators of changes in the light;
- unhindered and provide information about the time critical;
- The analysis of the data must also be accurate.
Among representatives of database management systems: Lotus Approach, Misrosoft Evaluation, Vogland dVase, Vogland Ragadox, Visual FoxPro Misrosoft Misrosoft Visual vasis, and also "client-server" technology is used in applications created databases Misrosoft SQL Server and Ogasle can be noted. Common, as well as the capabilities of other applications, such as creating processes, text, graphics packages, etc. And a set of high-level language versions (often with SQL and / or BB dïalekterin) and created a visual API for application programming is a technology that allows the use of text-ham. Thus, based on a package that is more precise, in which language and which formats will be applied to the most important information. In addition, the "de-facto" standard of "open-ended" is the creation of the literature most quickly stated, "applications" (or RAD), which is an even more convenient and powerful data processing system for various applications, and the ability to use technology and the need has been. Thus, the "classic" DBMS and the components necessary to quickly create applications in a row, it is difficult to create a "classic" means DBMS, which was sometimes impossible speed, which is crucial for Visual 4.0 and Visual C ++ programming languages. Database management is a modern method of "client-server" technology requires the use of a wide range.
Gestures, rather, the programmer or svyazan konkretnoy ramkalarımen package, and ten mojet byt ïspolzovan razlïçnıx prïlojenïyax, zavïsïmostï fire postavlennoy tasks.
Delphi is currently the most common application for creating a system. One of the main features that are created using programs running Windows programs, but it is quickly forming tools (rapid application development, RAD) belonging to the group.
My course was to automate the work of the library staff. A database is MS Access, and the interface in Delphi is done.
Form and its properties
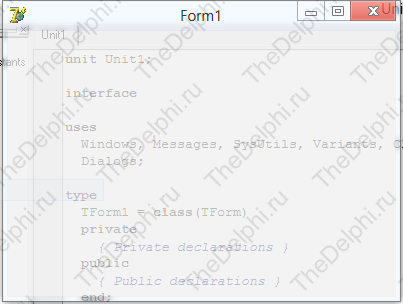
It's time to plunge into the practical part and in this lesson we'll look at the form and its basic properties. As you already know, all properties of any object in Delphi are located in the Object Inspector.
Open Delphi, create a new project and select the form. Let's briefly go over its main properties.
The first property that we'll look at is the Align property. It is responsible for

AlBottom - sticking the form to the bottom of the screen
AlClient - stretching the form to full screen
AlCustom - by default
AlLeft - sticking the form to the left edge of the screen
AlNone - without alignment
AlRight - shape adhesion to the right edge of the screen
AlTop - sticking the form to the top of the screen
The following property is AlphaBlend. This property is responsible for the transparency of the form. We set its value to True and below we see the AlphaBlendValue property. It can take values from 1 (full transparency) to 255 (full non-transparency). Set the value to 200 and see the transparent shape.
Turn off the transparency of the shape and move on.
The following property is AutoScroll. Accepts Boolean values. I think by the name of the property, its purpose is clear. If any component is outside the form, the scroll automatically appears on the form.
The following property is AutoSize, it finds and customizes the optimal size of the form. If we now set the value of True and throw it on the form of the Memo component, this property will remove all empty places on the form when compiling and wrap the Memo component. Because of this, we can not change the size of the form.

Let's return the AutoSize property to False and continue to examine the rest of the properties.
The BorderIcons property. In it, we can specify which buttons we will see in the form header. Now we can see the "minimize", "expand" and "close" buttons. If we set all these buttons to False, then the form cap will be completely empty.


Return all values back and go to the next property.
The BorderStyle property, it is responsible for the style of the borders of our form. You can experiment with different values yourself. I would just like to highlight the value of bsNone, that is, after compilation our form will not have borders at all, it allows us to develop our designs and skins for the form.
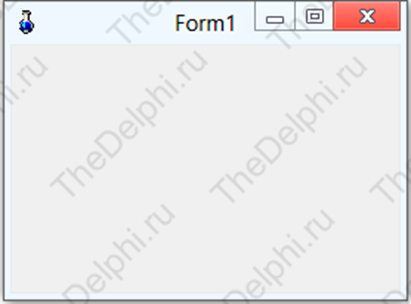
Next, consider the property Caption. Almost every component has it. Now it has the value Form1, let's change it to the Program and we see that the header of our form has changed.
The Color property is responsible for the color of the form. Very simple property and I think it will be more useful for you to experiment yourself.
The Cursor property is responsible for what the cursor will be when hovering over the form. Set the value of crHourGlass and compile the program. We see that there is a kind of false cursor that indicates the program's hang.
You've probably seen pop-up hints in various programs that appear when the cursor is delayed on some component. The Hint property is responsible for the text of this hint. Write the Form and compile the program. Hold the cursor on the form and nothing pops up:). And all because we have not included the display of this hint. You can enable it in the ShowHint property by setting True. If you now compile and hold the cursor on the form, we'll see a hint.
Next property Icon, it is responsible for the icon in the upper left corner of the form. Select the Icon property, click on the button with three dots and we have the icon download window.

Click on the Load... button and select the image with the.ico extension. Icons from Delphi are in the folder C: \ Program Files (x86) \ Common Files \ Borland Shared \ Images \ Icons. After you have selected the icon, we press the button and after compilation we see that the program icon has changed.
The Left property specifies the distance in pixels from the left edge of the screen to the left edge of the form.
The Name property is used to write the name of the form that we will refer to in the code editor window.
The Position property is responsible for the position of the form after compilation. Experiment with the values.
Next property Top, it is similar to property Left, only the count of pixels goes from the top edge of the screen and up to the top edge of the form.
The Width and Height properties are responsible for the width and height of the form in pixels.
The Enabled property is responsible for activity. Let's now throw on the form of the Button component and change its property Enabled, setting the value to False. We compile the program and see that our button is not active and can not be clicked on.

Well, the last property that we will discuss in this lesson is the Visible property. This property is responsible for the visibility of the component. Change this property at the button, setting False and compiling the program, you will not find the buttons.
Working with forms in Delphi.
In Windows, the main element of the user interface is a form. In Delphi, almost every project has at least one window - the main application window. All windows in Delphi are based on the TForm object. In this article we will consider the main events involved in the "life of the form."
Delphi form
Forms have their properties, events and methods, with which you can control the form and behavior of the form. The form is a regular component of Delphi, but unlike others, it does not exist in the component pane. Normally, a form is created when creating a new project (File | New Application). The newly created form will be the main form of the application.
Additional forms in the project are created via File | New Form. There are other ways to create forms, but here we will not consider them...
Like any other component (object) the form has its own methods and responds to events. Let's look at some of these events...
Birth of the form in Delphi
OnCreate -> OnShow -> OnActivate -> OnPaint -> OnResize -> OnPaint...
OnCreate The OnCreate event occurs when the TForm is created and only once. When creating a form (catholic property Visible is set to True), the events will occur in the following order: OnCreate, OnShow, OnActivate, OnPaint. In the OnCreate event handler, you can do some initialization, however, any objects created in OnCreate will be destroyed in the OnDestroy event.
OnShow This event is generated when the form becomes visible. OnShow is called just before the form becomes visible. This event happens if you set the Visible property to True, or when you call the Show or ShowModal methods.
OnActivate This event is generated when the form becomes active, ie when the form receives input focus. This event can be used to change the form element that should receive focus.
OnPaint, OnResize These events are called each time the form is created. At the same time, OnPaint is called each time when any form element needs to be redrawn (this event can be used if it is necessary to draw something special on the form).
Life forms in Delphi
When the form is created and all its elements are waiting for their events to process them, the life of the form continues until someone clicks a cross in the upper right corner of the form!
Destroying the form in Delphi
When a form is destroyed, events are generated in the following order:
... OnCloseQuery -> OnClose -> OnDeactivate -> OnHide -> OnDestroy
OnCloseQuery If we try to close the form using the Close method or by another available method (Alt + F4 or via the system menu), the OnCloseQuery event will be generated. Thus, this event can be used to prevent the form from closing. Usually, the OnCloseQuery event is used to ask the user whether it is sure (perhaps there are unsaved data in the application).
Procedure TForm1.FormCloseQuery (Sender: TObject; var CanClose: Boolean);
Begin
If MessageDlg ('Really close this window?', MtConfirmation, [mbOk, mbCancel], 0) = mrCancel then
CanClose: = False;
End;
The OnCloseQuery event handler contains the CanClose variable, which determines whether the form can be closed. The initial value of this variable is True. However, in the OnCloseQuery handler, you can set the CloseQuery return value to False to abort the Close method.
OnClose If OnCloseQuery returned CanClose = True (which indicates that the form should be closed), the OnClose event will be generated. The OnClose event gives the last chance to prevent the form from closing. The OnClose handler has an Action parameter with the following four possible values:
CaNone. The form is not allowed to close. It's like we set CanClose to False in OnCloseQuery.
CaHide. Instead of closing, the form will be hidden.
CaFree. The form will be closed, and the resources it will use will be released.
CaMinimize. Instead of closing, the form will be minimized. This value is set by default in the MDI child forms.
Note: When the user turns off Windows, it will be called OnCloseQuery, not OnClose. If you do not want Windows to finish its work, then put your code in the OnCloseQuery event handler, although CanClose = False will not do what is done here.
OnDestroy After the OnClose method is processed and the form is closed, the OnDestroy event will be called. In OnCreate, you usually do actions that are opposite to those that were done in OnCreate, that is, the destruction of the created objects and the release of the allocated memory.
Naturally, when the main form of the project is closed, then the application will be completed.
Data filtering
Using Filters to narrow the scope of data that is presented to the user.
As stated in one of the previous lectures, both TADOQuery and TADODatSet (as dataset components) share the same set of common methods and events. On of the features exposed by those datasets is the ability to narrow the scope of data that is presented to the user.
Consider that you might have a database table with thousands of records, but your users are interested in seeing or working on only a small subset of the table data.
To follow the article, set up the data form with the core components (data-access and data-aware) as described in the previous chapters. The next code examples will assume that you are working with the ADOTable component pointing to the Applications table in our working Access database.
Filtering Filtering is the method by which some data from the dataset is excluded from view by displaying only those records that meet specific criteria. Filtering permits you to present varying views of the data stored in a dataset without actually affecting that data. This criteria is set through the Filter property of the dataset component (TADOTable or TADOQuery), it can be set at both design and run time. Filter property represents a string that defines the filter criteria. For example, if you want to limit the displayed data (from the Applications table) to freeware applications (cost $0.00), a filter such as the following will only display records that meet the condition:
ADOTable1.Filter:= 'Cost = 0';
You can also add a value for Filter based on the text entered in a control. If the filtered dataset should only display free applications and you want to enable users to supply the type of the applications, a filter could be set as follows:
ADOTable1.Filter:=
'Cost = 0 AND Type = ' + QuotedStr(Edit1.Text);
By using combinations of the following operators, you can create quite sophisticated filters.
Operator Meaning
< Less than
> Greater than
>= Greater than or equal to
<= Less than or equal to
= Equal to
<> Not equal to
AND Tests two statements are both True
NOT Tests that the following statement is not True
OR Tests that at least one of two statements is True
Filtered, FilterOptions, FilterGroup, OnFilterRecord The Filtered property is a Boolean value (True or False) that determines if the string in the Filter property is used to filter the dataset. When Filtered is False, the filtering is ignored and the complete dataset is available to the application.
The FilterOptions is a set of two values - both used when filtering string fields. If the foCaseInsensitive is included in the FilterOptions, comparison between the literal in the Filter property string and the field values are case-insensitive. The foNoPartialCompare forces Delphi to treat the asterisks (*) as a literal character rather than as wildcard. By default, FilterOptions is set to an empty set.
The OnFilterRecord event fires each time the filtering is enabled and a new record becomes the current one. You will generally use this event to filter records using a criterion that can't be (easily) implemented using the Filter property.
procedure TForm1.ADOTable1FilterRecord
(DataSet: TDataSet; var Accept: Boolean);
var AppZipSize: Single;
begin
AppZipSize:= ADOTable1.FieldByName('size').Value;
Accept:= (AppZipSize < 10);
end;
The key element here is the Accept parameter. You set the Accept parameter to True for any rows that you want to show. The preceding code sets Accept to True for any rows in which the Size field contains a value that is less than 10 (all apps whose download size is less than 10 Kb).
The FilterGroup set property allows you to filter records depending on their status.
To filter or not to filter Note that
· the Filter property behaves much like a WHERE clause in a SQL statement.
· you can have multiple conditions, specified in the Filter property, separated by AND and OR operators.
· generally one should avoid Filters unless the fetched recordset is small. A filter is done on the fly, and may or may not use the current index (filters are applied to every record retrieved in a dataset).
· filters are rarely used with client/server databases, a SQL query (TADOQuery) should be used to achieve the same effect that filters have on local databases.
· you should generally not use filtering with datasets on data modules. In a specific situation when filtering a table that is never viewed from any other form, or a table that makes use of a range, or sort order that is not used anywhere else in the application - data modules *should* be avoided.
· to search a filtered dataset, you can use the FindFirst, FindNext, FindPrior, and FindLast methods. These methods are the best way to search a filtered dataset because the filter is reapplied each time one of these methods is called. Therefore, if records that previously did not match the filter have been modified so that they now match the filter, they will be included in the dataset before the search is performed.
Searching for data