Laboratory work №2.3
Design of graphic images by means of raster graphical editors (Photoshop, etc.). Using of editors to work with raster graphics to solve applied problems.
Work with semilucent layer - 1
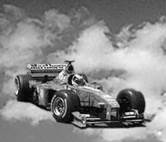
It is necessary to combine two pictures: racing machine (trans_layer1.psd) and clouds (trans_layer2.psd)

You will distinguish from the first picture a machine by means of magnetic lasso. A selection will memorize in an alpha-channel. Copy the distinguished image on a picture with clouds. That must turn out here.
Now on the panel of properties of instrument of Eraser (Eraser) choose
modification of eraser of Airbrush (Air brush). Pick up the parameters of air brush it is a degree of pressure, transparency so that a next picture turned out.
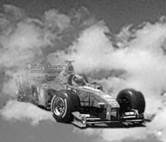
We will put a road under a machine. For this purpose we will return on a picture with
by the image of machine on the road. If for you a machine is distinguished, then will simply delete it. Otherwise will load the selection of machine from a аль-фа-канала and then will delete him. For you there must be one road. Copy a road previous picture and will combine it with a machine
Further, by means of eraser, gradually wear away the superfluous areas of до-роги, as a result a layer will show up with sky. Here that must turn out approximately.

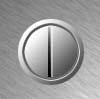
Simple button
It is sometimes needed to do the button for a web site for a few seconds. This method can very help you herein. Foremost draw выделе-ние as a rectangle. Then inundate a selection a gradient.
By means of command Select /Transform Selection at pushed-in кла-вишах Shift and Alt squeeze a selection. Inundate this area a gradient in дру-гом direction.
Create the button, shown on pictures below.

Smooth border of image
Open the file of gran_fon.
You will distinguish an oval round the necessary area of picture with растушевкой 5 pel, as shown on a picture.
Invert a selection and will delete the distinguished part. Полу-читься must, as on a picture below.
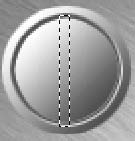
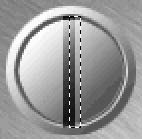
Screw-bolts and riveting
Do a selection, as shown on a picture.

Inundate its linear gradient.

Squeeze a selection the method indicated in a previous task. За-лейте selection the same gradient, but west-to-east.

It is possible to repeat these actions. A result the fully stylish riveting (especially if to decrease it to the necessary size) will become.

To make out of it a screw is not difficult. Foremost do вы-деление, as shown on a picture, and press combination of the keys of Ctrl+L (command of menu of Image/Adjustments/Levels).
In the appearing window of Levels specify in the central field of Input Levels a value from 0.1 to 0.4.

You will slightly displace a selection to the right and again cause the window of Levels. Only for this time enter in the central field a value from 1.5 to 2.5.
The prepared screw must look approximately so.
Using изложенные higher methods, draw metallic дос-ку, presented on a picture below.

Use of layers
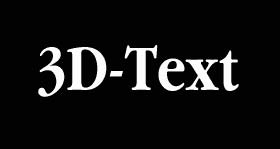
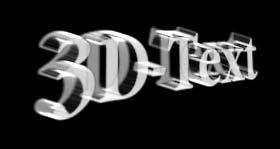
1. Cоздайте image measuring 280 on 150 points. To set background and foreground colours by default. Inundate a background a black. Using a white color, write "3 D - Text" by the type of ITC Garamond, semi-bold outline, a height is 60 points. After it choose a menu of Layer/Rasterize/ Type item, to translate text in a raster image.
1. 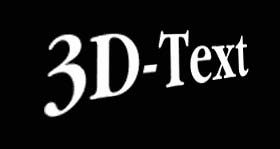
2. Adding a prospect, give inscriptions kind, similar with a picture on the right. Then copy a turning out layer in the palette of Layers. you will disconnect the displaying of copies of layer. you will be commuted on the layer of Background, and make confluence of visible layers.
3. you will apply the filter of Filter/Blur/Motion/Blur with a value Angle (corner) are 20 (minus twenty) degrees and with a value Distance 20 pixels.

4. you will apply the filter of Filter/Stylize/Find Edges. Press Ctrl+I, that to invert image.

5. you will include the отображе-ние copies of layer with text. In the palette of Layers (Layers) за-дайте to this layer of прозрач-ность 70%. Press V, что-бы to include an instrument
Move (Moving). Со-
you will contain a layer with text with the right side of трехмер-ной inscription. Then create the copy of layer with text in the palette of Layers (Layers). Set to the new layer of прозрач-ность 30% and will combine him with the back side of three-dimensional inscription.
Use of channels
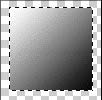
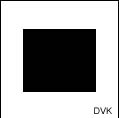
1. Create a new image measuring 120х120 pel. you will distinguish part of image of rectangular form, invert a selection and will memorize him in an alpha-channel (a picture below).
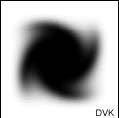
2. Wash out the image of Filter / Blur / Gaussian Blur with коэффициен-том of размытия 10.
3. Now deform an image by means of Filter / Distort/ Twirl. Choose parameters on the discretion.

4. And in the end will do a "pea": Filter / Pixelate/ Color Halftone.
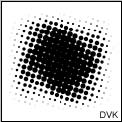
5. We pass to the mode of RGB and inundate a background any color. Further load alpha-channel as selection and inundate the distinguished area any color.

It is also possible a "pea" to do text. As you understand, for this purpose in an alpha-channel it is necessary to do a not square, and letter or text.
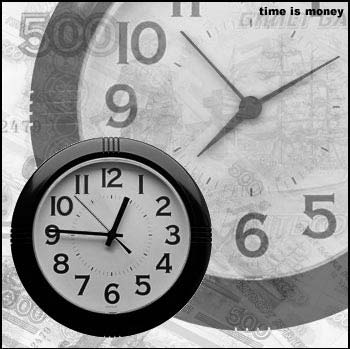
Excision of objects from a background through blending
Cоздадим коллаж, applying blending.
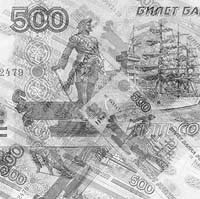
Images of money note are in clipart/001b.jpg, clipart/002b.jpg, clock - in clipart/005b.jpg. Money may need for creation of background. It is necessary to inundate a background a few layers of repetitive изобра-жений money and influence a turn, transparency and scale for different layers. Turning out pattern it is needed to write down in the library.
Whew the created background must look approximately. 28
We will take a picture with a clock and will place it a layer higher than background. After it will open the window of Layer Style (Style of layer)
Presented below on a picture part of interface allows the на-строить mixing of two images.
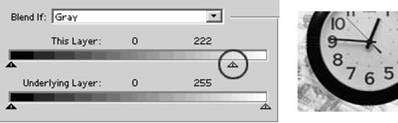
You will displace a bit to the left border of white. you do part of pixels, lying in area of from 222 to 255 this action, transparent.
As a result a white background (picture on the right) disappears for you. If to press button Alt and to pull at a mouse one of points, it is possible to divide triangle of on two. A smooth transition is thus set from opaque to transparent.
If to set too large values, then it is possible to do clear part of picture which generally white is not. In general about colors, talking is not here needed, it is rather needed to talk about a difference in the brightness of pixels.
All is thus cut out very neatly, abandoning untouched the once-personal shallow cuts. Here that must turn out in the total.